


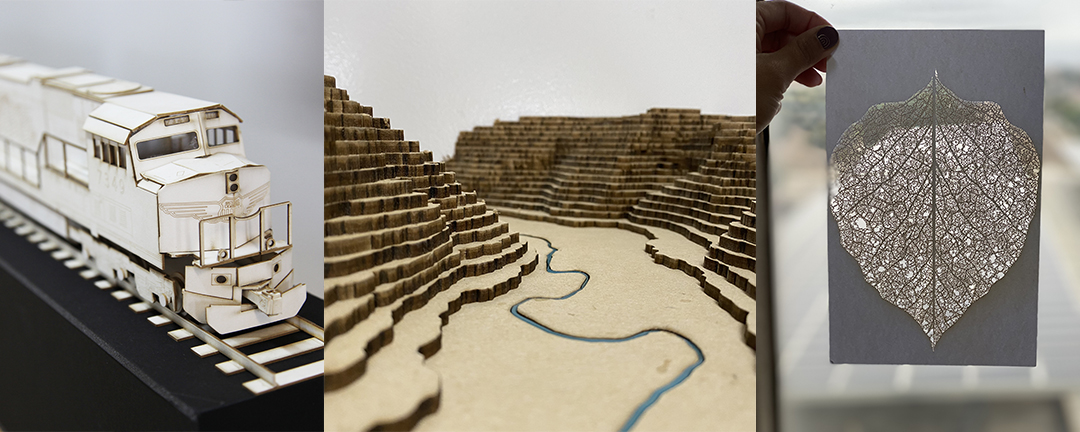
LASER CUTTING PROCESS
1. Once your file is completed, please submit it by emailing to modelshop@otis.edu. Please include your name, phone number, and any special instructions.
2. Next, bring your material to the model shop and drop off on a shelf provided, and sign the sign in sheet. You will not secure your place in line until you have dropped off material, and signed the sheet.
3. Files are printed in the order they are received. Typical turnaround for pick-up is after 5:00 p.m. the following day, under usual laser cutting demand. Allow more time during finals and other times of heavy demand.
4. All files will be paid for using the papercut system. Once the file is complete we will charge your account.
5. Once the file has been paid for, you will receive an email letting you know that your file is done, and the shelf you can pick up from.
PRICING
The cost of Laser Cutting is $3.00 for the first minute and $0.50 for each additional minute. There is a cap of $35 for prints up to 2 hours, and a second cap of $70 for prints up to 4 hours. For print jobs containing more than 10 files or artboards, an additional charge of $1.00 per file or artboard will be added to the total print job. The balance is due at pick-up. Cuts will not be released without payment. This payment should be paid through your PaperCut account online or through the 4th floor computer lab.
LASER CUTTING MODES
RASTER ENGRAVING: Typically BLACK shapes/lines/text
The laser head goes back and forth, line by line to create a filled image. This is used for files where there are solid shapes, photos, or lines with width. It is used for engraving only, not to cut all the way through material.
VECTOR ENGRAVING: Typically GREEN or BLUE lines, STROKE WEIGHT = 0.1pt
The laser head follows the vector lines of the file. This is an engraved line (similar to a score) that does not cut all the way through the material. Unlike Raster Engraving, this cannot create lines with thickness greater than the kerf (thickness) of the laser.
VECTOR CUTTING: Typically RED lines, STROKE WEIGHT = 0.1pt
The laser head follows the vector lines of the file. Unlike Vector Engraving, Vector Cutting will cut all the way through the material. It cannot create lines with thickness greater than the kerf (thickness) of the laser.
USING FONTS
All typefaces should be “outlined”(converted from live text to shapes). To do this:
Select Text > click TYPE menu > select “Create Outlines”
FILE SETUP
All files should be 2D only. No extruded models will be accepted, as the machine cannot read them. Your file must also be to scale. We cannot cut your file unless the following are met:
ILLUSTRATOR:
1. Create a New Document in Illustrator
- Document Size = size of your material (can not exceed 32” x 18”, and must be horizontal)
- Color Mode = RGB (use colors specified below in “Printing Information and Tips”
2. Registration must be exactly as you would like it to appear on your material (meaning your artwork should be placed where you want it to cut/engrave on your material in relation to the upper left origin)
3. Vector Cutting, Vector Engraving and Raster Engraving must be set to separate colors.
- Typically Black is for Raster Engraving, Red is for Vector Cutting
RHINO & AUTOCAD:
1. File must contain a 32” x 18” rectangle.
2. Inside that rectangle, aligned to the upper left corner there must be a rectangle that is the same size as your material. Position your artwork within the material rectangle and verify that it will fit.
MATERIAL GUIDELINES
The maximum cutting size is 32” x 18” (horizontal). The laser cutter accepts most wood, paper or plastic material. The material must be flat with no protruding parts to avoid damage to the machine or distortion of the file during printing. If unsure please consult a shop technician before purchasing.
ACCEPTABLE MATERIALS FOR CUTTING:
- Acrylic up to 3/8”
- Plywood up to 1/8”
- Paperproducts
- Hardwood up to 1/4“
- MDF up to 1/4”
- Leather
- Fabrics (natural and synthetic)
- Cardboard
- Illustration board
ACCEPTABLE MATERIALS FOR ENGRAVING:
Same as cutting with the addition of:
- Marble/stone
- Anodized and coated metals
- Glass
- Rubber stamps
UNACCEPTABLE MATERIALS INCLUDE:
- Resin
- Polystyrene
- PVC based vinyl
- Metals
*For other materials please inquire.
PRINTING INFORMATION AND TIPS
The laser cutter reads only 8 RGB colors. Any lines not matching these colors cannot be cut. Each of the colors can be assigned a different setting. For simple files use Black for Raster Engraving and Red for Vector Cutting.
COLORS MUST MATCH THESE RGB NUMBERS EXACTLY:
| COLOR | R | G | B |
| Black | 0 | 0 | 0 |
| Red | 255 | 0 | 0 |
| Green | 0 | 255 | 0 |
| Yellow | 255 | 255 | 0 |
| Blue | 0 | 0 | 255 |
| Magenta | 255 | 0 | 255 |
| Cyan | 0 | 255 | 255 |
| Orange | 255 | 102 | 0 |
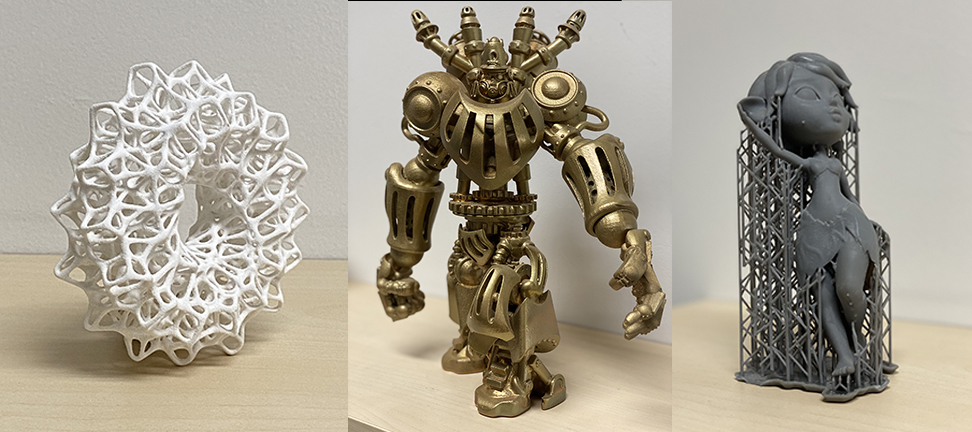
FILE TYPE:
Save CAD file (Rhino, SolidWorks, etc.) as an .STL file (stereolithography)
COST OF PRINTING:
Calculate your build in cubic inches and use the equations below to estimate printing costs:
ProJet 360 (powder) total cubic inches x $6.00 = cost of printing
Dimension SST (plastic) total cubic inches x 1.5 x $8.00 = cost of printing
Form2 (resin) total liquid volume (mL) x $0.50 = cost of printing
*Remember this is just an approximate estimate. You will be given your total cost at the time of pickup.
(You can check your model volume in Rhino under “Analyze” > “Mass Properties” > “Volume” )
SUBMITTING YOUR FILE:
1. Once your file is completed, please submit it by emailing to modelshop@otis.edu. Please include your name, phone number, and any special instructions.
2. Once the techs have looked over your file and it has been cleared for printing, we will email you with a quote for you apporval.
3.Files are printed in the order they are received. Most 3D prints will be finished within a week, sometimes sooner. If you are under a tight deadline, please ask in advance for an estimate on when your file will be done.
4. All files will be paid for using the papercut system. Once the file is complete we will charge your account.
5. Once the file has been paid for, you will receive an email letting you know that your file is done, and the shelf you can pick up from.
PRINTING TIPS:
Make sure your file is saved in inches.
Separate parts into different .STL files, or space them closely together to conserve space.
Set all file parts onto the zero ground plane.
MAXIMUM BUILD ENVELOPE:
| PRINTER | BED SIZE | MIN RESOLUTION |
| Projet 360 (powder) | 8" x 10" x 8" H | 0.004" , 100 micron |
| Dimension F170 (plastic) | 10" x 10" x 10" H | 0.005" , 100 micron |
| Form2 (resin) | 5.7" x 5.7" x 6.9" | 0.001" , 25 micron |
| Ultimaker ProS5 Pro | 13" x 9.4" x 11.8" | 0.001" , 25 micron |
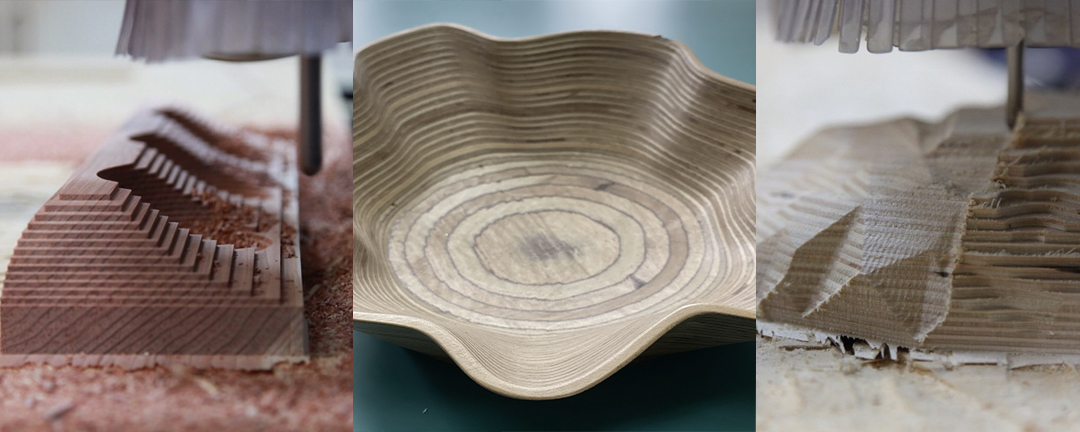
SUBMITTING YOUR FILE:
All files submitted for CNC cutting should be emailed to modelshop@otis.edu. Once the files has been reviewed by a staff member, we will schedule a day for you to bring in your material. We will not accept material before this date, as we do not have room to store it.
COST OF CUTTING:
Flat rate of either $20 or $40 depending on size and complexity of file.
PAYMENT:
Payment will be made through your PaperCut account, accessed online or through the 4th floor computer lab.
FILE TYPES:
3D Geometry
• CAD file: Rhino or STL file (stereolithography)
• if file is double sided, each half can not exceed 2.5” in height
2D Geometry
• Vector file: Adobe Illustrator, Rhino, DXF, or AutoCad
• Use 2D drawings for 2D cutting (thru cuts, pocketing, dadoes, etc).
• 2D geometry should be closed or made into polylines wherever possible.
• It is NOT possible to cut square interior corners with a CNC router.
Holes
• Holes smaller than 1/2 in. will be drilled as pilot holes, which will establish the position of the hole.
• Holes larger than 1/2 in. can be cut at any diameter.
GUIDELINES:
• All CNC files MUST be reviewed and approved by Model Shop techs. If you are inexperienced
designing files for CNC fabrication, talk to us first. We can help you avoid common mistakes.
• Allow at least ONE WEEK (sometimes two) lead time for CNC jobs. This is one week from the
time we receive your clean, ready-to-cut file, plus materials (also ready for cutting).
• Rhino files strongly preferred. AutoCAD and
Illustrator is okay for 2D files. All other files types must be converted to .stl and reviewed for compatibility.
• Maximum size for the CNC is 48” wide x 96” long, and 2.75” depth.